Option 1 · Premium Editorial Signal Guide
When a room turns precision into a blur
If the center image feels vague, hard-panned details will not stay put, or drum attacks seem less decisive than they do on headphones, start by suspecting the room before reaching for another mix move. Early reflections arrive soon enough to fuse with the monitors’ direct sound, so the monitoring problem can masquerade as a panning, EQ, compression, or reverb problem.
A vocal center that spreads, cymbal placement that wanders, or a snare whose front edge feels softened.
First reflections from side walls, ceiling, desk, or console surface arriving roughly 5–20 ms after the direct monitor signal.
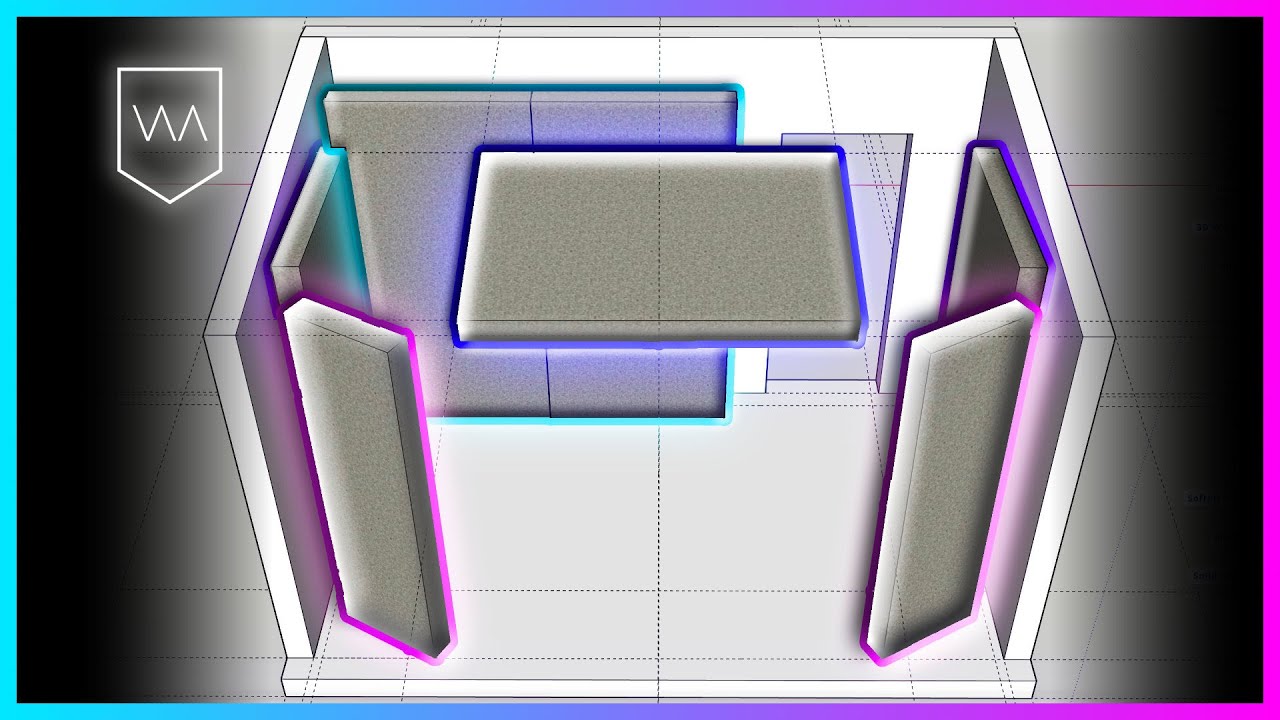
Find reflection points with the mirror method, then compare before and after treatment with one familiar, mono-compatible reference.
What early reflections actually change
At the listening position, the direct monitor signal and a delayed copy from a boundary combine. The delay is short enough that you do not hear a separate echo; instead, some frequency bands reinforce while others partially cancel. That comb-filtering pattern is not stable across the room, so a small head movement can make the tonal balance and stereo image shift.
The practical consequence is decision drift. You may brighten a vocal because a reflection makes the presence range feel recessed, or push a panned guitar harder because the side image is collapsing at the chair. Those moves can sound excessive on a more neutral system because the mix was compensating for a room artifact.
Do not judge a reflection issue by a single frequency dip. Judge it by repeatable changes in image focus, transient definition, and tonal balance when you move a few inches or alter the boundary condition.
Run a focused diagnosis
- Lock the listening geometry. Put the chair at the normal mix position, center it between the monitors, and keep monitor angle, height, and level unchanged during the test.
- Use a short reference loop. Choose a mix with a stable vocal center, sharp snare, clear ambience, and a hard-panned detail. Avoid a dense master whose limiting disguises transient changes.
- Map first-reflection points. While seated, have another person slide a mirror along each side wall and the ceiling. Mark every location where the tweeter becomes visible. Also inspect the desk or console between speaker and ears.
- Make one reversible intervention. Place a broadband absorber, folded moving blanket, or temporary panel at one marked point. Keep it large enough to cover the useful reflection area rather than treating only a small patch.
- Compare at matched level. Switch between untreated and treated conditions without changing monitor gain. Listen for a tighter phantom center, clearer attack, and less tonal change as you make small head movements.
Quick confirmation
If a temporary panel makes the vocal center narrower and the snare more immediate without changing playback level, the panel is revealing a reflection problem—not “adding detail” to the mix.
Make treatment choices that preserve the result
For first-reflection control, broadband absorption is usually the dependable starting point. A panel with meaningful thickness and an air gap can address more of the low-mid and midrange energy than thin foam. Side-wall symmetry matters: a serious asymmetry can make the left and right monitors behave differently even if one wall is technically treated.
The ceiling cloud and desk are often the missed pair. A low, reflective desk can create a strong vertical reflection that affects vocal presence and snare attack; a cloud can make the image more stable even after side walls are addressed. Treat one variable at a time, then repeat the same reference loop and chair-position check.
Do not cover every reflective surface blindly. Over-absorbing only the top end can leave a room dull yet still uneven in the low mids. The goal is a trustworthy monitoring zone, not a dead room.
A practical mix-room example
Imagine a vocal that seems to pull left when you lean toward the keyboard and a snare that alternates between crisp and papery as you sit upright. The immediate temptation is a vocal pan correction and a 3–5 kHz EQ boost on the snare. Instead, mark the side-wall mirror point and the desk bounce path, place temporary broadband material at each, and replay the same eight-bar passage.
If the vocal holds center and the snare gains a more consistent front edge, remove the temporary EQ and pan corrections before committing to treatment. The room has changed the evidence behind the mix decision; now the mix can be judged on a more repeatable reference.
Where this method stops
First-reflection treatment will not solve modal bass buildup, speaker-boundary interference, rattles, poor monitor placement, or a fundamentally inaccurate playback system. It also cannot replace measurement when you need to understand decay time or low-frequency behavior. Use the mirror method as a fast, audible first pass, then add measurement and placement work when the remaining problem points below the reflection-dominated range.
The durable takeaway: before correcting a fuzzy image inside the DAW, prove that the room is not smearing the information you are trying to judge.